Ever wanted to create an HDR effect in Photoshop? Well, here’s one way you can do it!
First and foremost, I apologize for the lack of audio in my tutorial videos. I’ve tried to talk over them a few times, but only end up getting annoyed with the sound of my overly-raspy voice. That being said, I’ve lined out my steps below for you.
In this example, I’ve downloaded two shutterstock images; one for the background, and one as a main image.
Step 1: Paste your background layer.
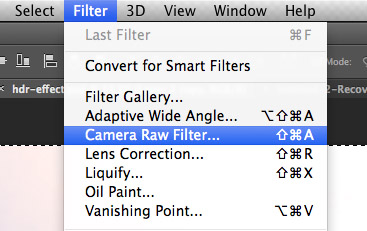 Apply Filter >> Camera Raw Filter to the background image. As is the case with all tools & filters in photoshop, I encourage you to overly use this filter and all its options to get a better understanding of its capabilities.By swinging the clarity level back and forth, you can get a feel for how heavy of an effect you want. Keep in mind that this is the background image and we will be blurring it later, so the effect doesn’t need to be as heavy as what you’ll do in the foreground. Play with the temperature & levels until you like it, then click apply. In this example, I played around with the levels and sharpening effects to get the look I wanted.
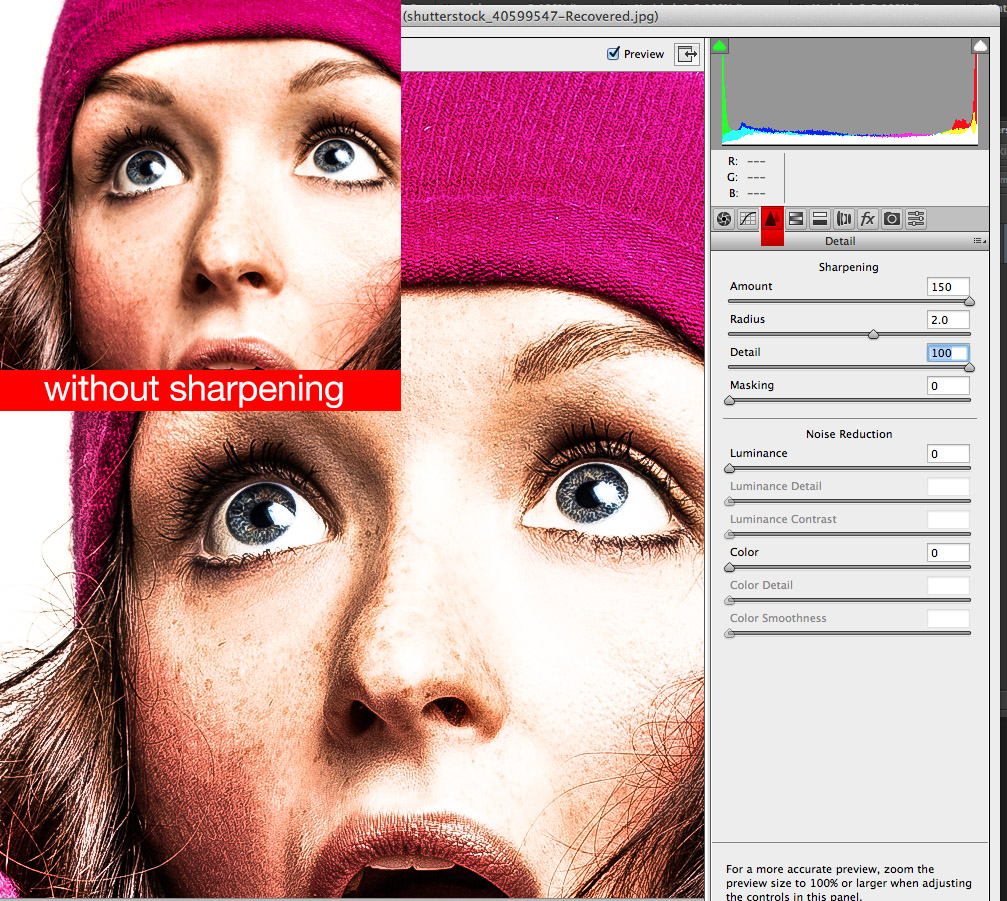
Step 2: Paste your foreground image and apply Filter >> Camera Raw Filter, this time bringing the clarity all the way up. Ideally you want to zoom in on the face or a detailed area within the photo to see your detail amount. Once the clarity is up, adjust the other levels to your liking.
Step 3: Blending.
To blend it with the background, set the layer to “multiply.”
Then duplicate that layer, select your first layer, then select the background with your magic wand, and delete it. Set this layer back to normal from multiply. Right click, select pixels, and set the lightness to be 100%.
I didn’t do this in my example, but ideally, you’ll want to take your eraser and clean up your white layer to avoid having excess white space.
Step 4: Blur The Background: Duplicate your background layer and go to “Filter, Blur, Lens Blur.”
Slide the blur amount to where you like it then apply.
Take your eraser and set the opacity down to 50% and erase the areas closest to the foreground.
Finishing touches!
Select your foreground image again and go to Filter, Sharpen, unsharp mask. Swing the amount upward until you like the level and apply.
Lastly, add a new adjustment layer: Photo filter, to the very top of all your layers. Adjust this until the image flows together the way you want it to.
Add your text/design/ad copy to the top, and viola! HDR photo effect in photoshop!
Here are some screenshot examples of the different sections & uses of the raw filter. (Click the image to view larger version.)